Monday, November 29, 2010

Giveaway Winners

The winners of the Oh Baby it's a Martha Stewart Giveaway are:

1. Anonymous said...

I also my home with a new born, 6 weeks old today, and can't wait to make crafts together!

2. Suzie said...

posted on FB

3. Anonymous said...

You can add me to the draw. Alexander is really enjoying doing crafts. I'm going to make a basket of supplies for him for Christmas.

4. Anonymous said...

Very Cute Sarah... Dante the Model helps to increase the WOW factor behind the amazing wonders of Martha Stewart!
Tracy O ;-)

5. Mya said...

Love it!

I will be contacting the winners for their information, so your prize packages can be sent out to you. Thank you everyone for entering the draw.

Wednesday, November 24, 2010

Startet Mommy Giveaway

My Friend Megan has a Blog called The Starter Mommy featuring money saving tips & freebies geared towards Moms & families. She is also hosting a giveaway. Please check it out here. She is giving away a $25 superstore gift care or a box of Huggies diapers.

Monday, November 22, 2010

Oh Baby it's a Martha Stewart Giveaway

I have been wanting to host this giveaway for a while, but a little adorable addition to the family arrived & I have been side tracked ever since. I have been busy trying to figure out what this little guy means to our lives. Now after a week at home we have kind of figured out a schedule, as scheduled as a newborn can be. I'm excited to finally have the opportunity to share these amazing products with you.

I have loved Martha Stewart from her first debut on cable TV. Her craft products have always been attractive, reliable, & unique. Once again Martha has released her seasonal Christmas craft supplies at Michaels, and the products are wonderful as always.

Here is Dante showing off the amazing Martha Craft supplies that are up for grabs.

I'm looking forward to using the treat boxes to give some homemade gifts. The divided Scandinavian treat boxes will be great for cookie swaps. In my opinion there are never enough uses for cello gift bags. The best part of the Martha Stewart bags & boxes are the included gift tags, tissue, & ribbon.

The berry & pine cone stickers are super cute & 3 dimensional. They will be fun to customize your Christmas package, used in Christmas/winter themed scrapbook pages, or to decorate your Christmas cards.

Glitter, what isn't more fabulous than glitter. I know what you are thinking. Glitter is for children. These days amazing things can be done with glitter especially the type of glitter Martha Stewart sells. It's a fine sanding type of glitter, not that chunky kindergarten craft project glitter. It can make plain ornaments into beautiful sparkly gems for your tree. It can also be use to liven up gift cards, & scrapbooking projects.

I never though I would fall in love with a set of paper punches. Martha Stewart is a genius. I have use paper punches in the past with only moderate success. I have never found them to work as well as I though they should & have had very little success creating a pattern with single punches becasue it's difficult to line up the punches so they are spaced evenly, & every time I end up either bunching up the punches at one end of the design, leaving too much space between the punches, or accidentally cutting into an adjacent punch. Martha has eliminated these problems by adding retractable wings to her punches which help line up your design for flawless punching every time. The punches can be use with our without the wings & all the wings fold to make the punches easy to store.

The Snow Flurry Punch Around the Page Sets has a corner & edge punch. The corner punch has two wings that can be pulled out singly, or together to allow you to punch inside or outside corners of folded cards.

The edge punch has designed wings that work with the corner punch that allow you to create seamless die cut borders on cards, gift tags, or scrapbook pages.

The Deep Double Edge Punch is incredibly beautiful. The wings on this punch line up perfectly creating a beautiful edge, or a continuous garland with ease.


The Giveaway:

5 winners will receive

· Punch Around the Page Sets (Snow Flurry)

· Berries & Pinecone Stickers

· Classic Christmas Glitter Packs

· Deep Double Edge Punch

· Scandinavian Snowflake compartment boxes

· Scandinavian Snowflake treat boxes

· Candy Caney Cello Treat Bags

To enter just leave a comment below by midnight (central time) on November 28th, & I will pick a winners by random number generator & post them on November 29th. Please leave your e-mail in your comment so I can contact you if you are a winner.

Want extra entries:
-Become a follower via RSS feed, or Blogger
-Share this giveaway on Facebook, or Twitter
-Share giveaway on your blog
(for each extra comment leave an additional comment for each activity to receive an extra entry)

Friday, November 19, 2010

Stay Tuned Holiday Giveaway Comming Soon!

For all my followers I will be posting HUGE Christmas Giveaway in the next week, so stayed tune.

Want HINT: She's the queen of Crafting, and all "Good things"

Thursday, October 28, 2010

Craft time

I have been trying to get some crafting in while I still can. I love having my own craft area. It makes it so much easier to have a room that I can start projects/messes & leave them to continue another time without destroying the dining room table or living room. In our one bedroom apartment I didin't even have room for my sewing machine, so I had to sew at my parents, which was not conducive to spontaneous projects. Here is a list of a few projects I have been working on.
  • I have been working on some taggie blankets for all of the cute new babes that have arrives in the last few months.

  • A diaper clutch to help organize our diaper bag. (picture to be added later)

  • Some nursery embellishments.

Squirrel for a modified Mobile.


Acorn for the same mobile

Finished mobile

  • Curtains for Al's office & the baby's room.
  • A wristlet to keep my things in the diaper bag & a new change purse that is large enough to keep money, ID, & some cards if I needed.
  • Most recently some tomato pincushions I saw on the Martha Stewart website. as usual they didn't quite turn out like Martha's picture perfect crafts, but they make me smile every time I sew.


  • I have a few other projects in mind, but we will have to see if I have time before our baby decides to arrive.

Sunday, October 24, 2010

Lean Time

Reading several friends blog posts has inspired me to write this post. Being that any day now we will be starting the new, exciting, & scary challenge of being new parents. This challenge will also bring a huge cut in our income & struggles to make ends meet. I have been trying to find ways to conserve money during this next year.


I hope to channel my life growing up when we did not have lots of money, but had tons of fun. My parents was great at keeping us happy & entertained on little money. We made our own playdough, cooked most of our meals, went camping, & when money was good took trips down to Grand forks for shopping, or a flight out to visit our aunt in Vancouver. My mother was always good at coming up with crafts, & taking us on walks to the park & around the neighborhood.


I think that this was the reality for most families I knew growing up, I know it was for both of us. People didn't go out several time a week to eat, or travel multiple times a year, or buy huge expensive electronics & toys. Eating out was a treat, we made our own Halloween costumes & crafts, & travel was something you saved up for over the year or even several years. In fact this is how Al's Mom still chooses to live.

To prepare for these lean times I have been cooking dishes to freeze for easy & inexpensive meal when we have no time to cook. Stocking up on baby care products when they are on sale. I have been slowly putting money on my Starbucks card (my own guilty pleasure) to allow me the splurge on a fancy coffee every so often. I have purchased some Groupons, a site that offers discounts for local companies. I have joined blogs about saving money featuring freebies & coupons.

We have decided to go the route, of cloth diapering & I want to make our own baby food when the time comes. I'm hoping to revamp the back garden next spring & plant a veggie & herb garden. We have been composting like crazy in hopes of having some nice rich compost to add to our garden, & we have less guilt if we have veggies & fruit go bad, knowing that they are going to a new cause.

Then the always amazing & incredibly talented Sarah M. has posted an amazing story about conserving money while still eating delicious, & healthy food. 20 Tips: How to eat well for less money couldn't have come at a better time. It helped to remind me of some money saving tips & strategies that will come in handy over this next year. I have never heard of Food buying clubs until I read this post & think that this is something I am going to look into. I will certainly be referring back to this post during lean times to remind myself how to maximize my dollars.

Sunday, October 17, 2010

Nursery Before & After

In an earlier post I promised a before & after of our nursery. At the time I gave a sneak peak of a project I had been working on for the nursery. So finally it's ready to be revealed. There are still some element that we are working on, but I'm afraid that I may not be able to share these photos with you if I don't post them now, since my due date is coming up soon, & at this point it could conceivably be any day now. Speaking of that I really have to get my bag packed.

Here are the Before Pics:
When we moved in, this room became a dumping area for any extra boxes. Good idea at the time, bad idea forgetting a nursery organized. This shot shows everything cleared out & ready for nursery prep. This corner will be the new home of the dresser/change station.


Here is the future home of the baby's crib. I would also like you to note the color in the room. All I can say is that the people who lived in this house before us really must have liked butterscotch. There are three rooms that were painted a butterscotch type color. The living room is luckily more on the pumpkin side, but the washroom upstairs is more of a peachy butterscotch color. That will be the next painting project. I can't wait until it's done, because it is UGLY.

Being that Al & I have decided not to find out if we are having a boy or girl, we needed a neutral nursery idea. I have also never been a fan of the traditional light blue or pink nursery. I am really not a Winnie the pooh fan. I have nothing against the books, TV shows, & movies, but I don't want to look at the rolly polly bear everyday. I have also never understood why nurseries have to be old fashioned & why they can not have a more modern look.

Years ago when I was watching one of the many reno shows I saw a nursery done in different shades of creams & reds. When it was time to plan our nursery, red was the first thing I suggested. I knew I wanted chocolate brown furniture, and I thought hat Squirrels would look really cute with the color scheme. The rest of the details just fell in place. When I mentioned to Al that I wanted to do the nursery in one of his favorite colors (red) & squirrels (his favorite animal), it wasn't hard to convince him. We decide to paint the wall a neutral light cream so when our babe grows up, they can have a blank slate to choose whatever theme they want , and the last thing I need is an over stimulated baby in a bright red room.

The final results:


The dresser/change station finally unpacked & in it's corner. We hope to put some art work on this wall, but haven't decided what we want yet. I was the first babe to sleep in this bassinet, & since then it was where my sister, cousins, family friends, & my new niece have spent their first nights.

The crib in it's alcove, with the first hint of the red accents. The first picture of the reworked mobile. Can you see the acorn from the sneak peak post?


The baby's view from the crib. I was not able to find window covering that I liked or matched our theme, so I decided to sew some curtains. I had a much different idea when I started the project, but I'm happy with how they turned out, & I my decide down the road to add some squirrel embellishments, & some red trim, but I can not decide, so for now we will live with them & decide what we think of them the way they are.

This red book shelf was original in my room as a girl. It started as a white bookshelf, then in my teens I decided I wanted all different colors of furniture, so I painted in purple, & now it has been transformed into a red bookshelf thanks to my mother & father.


We decided to put the glider out in the hall outside the nursery. To keep the open space in the nursery. Luckily we have a very wide hallway. Within 5 minutes of assembling the glider I took it for a test drive, & had a hour long, very comfortable nap.

Her is a close up of some of the squirrely details in the nursery:


Here is a close up shot of the finished Mobile. I haven't been able to get a proper shot of it yet, but it gives you the idea of the finished project.

One of two metal squirrel hook I found at Out of the Blue.

Another squirrel hook with a cute crochet hat our friend Becky made for the baby, & just happens to match the baby's snowsuit.

Once we have a few more of the details added to the nursery I will post an update, maybe by then there will even be a baby in the nursery, the best addition of all. My parents need a big THANK YOU for All the painting & decor help.

Friday, October 15, 2010

Risotto Love


I have been driving my loved ones crazy the last few years hanging on to a memory of a plate of grey goo that I ordered in a French Restaurant in Toronto, that ended up being one of the best things I ever ate. That grey goo was a mushroom risotto that will always go down in culinary history in my mind.

For a long time I have been fearful of attempting a traditional risotto, because of the long continuous process needed to make the yummy creamy dish I had been dreaming about. I was also not willing to make the instant version. I finally decided to give it a try. To make this goal happen I made it one of my New years Resolution. I know a bit of a crazy resolution, but I accomplished it. Better than my usual eat healthier, loose weight resolutions.

Unfortunately with all the craziness that life brings, including house shopping, moving, and pregnancy I had forgot about my resolution. That is until a friend of ours Sarah, the author of the food blog Food adventure club posted her own adventure with Risotto, Which reminded me of my resolution. Her wonderful step by step explanations of the process of making Risotto, and the advice she included made this task seem easily to accomplish.

For my own risotto attempt, I knew that I wanted it to include mushrooms, Parmesan, and truffle oil, but was not sure what other flavors would be needed. I used Sarah's recipe as a guide, and then added two other recipes one from the Food network by Tyler Florence & another from Epicurious to guide me with the use of the herbs I had in my garden & the addition of truffle oil. From these three recipes I pulled elements from each and created the recipe I used from my own risotto challenge.

Mushroom Risotto:

2-3 Tbsp olive oil
1 Onion Finely chopped
2 Cups dried mushrooms (I used 1 cup shiitake, & 1 cup crimini)
2 Cloves of garlic minced
2 Cups Arborio rice
5-6 Cups stock (vegetable or chicken)
2 Cups liquid reserved from rehydration of the mushroom
1/4 Cup white wine at room temp.
2 Bay leaves
2 Tbsp fresh parsley
1 Tbsp fresh thyme
1 1/2- 2 Cups fresh grated Parmesan
Salt & pepper to taste
2 Tbsp butter (optional)
3/4 Tbsp truffle oil (optional)

Method:
  • In a bowl rehydrate 2 cups dried mushrooms with 2 cups boiling water, until the mushrooms are tender.
  • While waiting for mushrooms, heat stock in a medium saucepan until boiling then reduce to a simmer.
  • Heat half the olive oil in a large frying pan over medium high heat. Add half the onions and fry until translucent, then add the reconstituted mushrooms (remember to reserve the liquid), the diced garlic, & season with salt & pepper to taste. Fry mushrooms until they are lightly browned. Set aside until ready to add to rice.
  • Add reserved liquid from the mushrooms to the heated stock.
  • In a large sauce pan heat remaining oil over medium high heat. Add the reaming onion, and fry until translucent then add the arborio rice and stir until all rice is coated & translucent.
  • Add white wine to the rice and cook until evaporated.
  • Add bay leaves
  • Add the stock over rice 1 cup at a time stirring continuously until the rice has absorbed all the added liquid.
  • Repeat the addition of stock 1 cup at a time.
  • At approximately the half way point of the stock addition add the mushroom mixture, and the fresh herbs to the rice. Then continue with the stock addition.
  • The rice should be creamy, but with a slight bite.
  • Remove Risotto from heat
  • Season with salt & pepper to taste
  • Add Parmesan, and butter string until melted
  • Stir in truffle oil.
Serve with a side salad, or your protein of choice. We had left over roasted chicken from the previous night.

The risotto was incredibly creamy & full of flavor. I like the meaty texture of the shiitake mushroom, (sliced portobellos would be interesting to try). The truffle oil added a nice earthiness to the dish. The risotto was nothing like the risotto I have been dreaming of over the years, but equally satisfying. This will definitely be adding to my repertoire.

The process was far from the labor intensive process I though it would be, and you get a nice steam facial during the process. If you decide to make risotto, which I would recommend. I would highly recommend following Sarah's steps & techniques she outlines in her blog.

Wednesday, October 13, 2010

Upcycle T-shirt necklace.


One of the reasons I started this blog was to share my creative endeavors. When we move to our new house one of the things my Husband & I were the most excited about was having our own creative spaces. I still need to get things organized, shelves hung up, & some really ugly wallpaper border removed before I am going to post pics of my space.

Here is what I whipped up last night. It's a really easy projects & there are tons of tutorials on line. I watched a couple of videos, & read a few Blog tutorials. Then I went to the basement & dug through my summer clothes & found two T-shirts I don't ware anymore. Each necklace took about a half hour or less to make, & the bracelets were even faster.


For the necklaces I tried two techniques. For the white necklace I tried cutting wider 1"strips & narrower 1/2" strips, to see if the different widths would make interesting textures mixed together. The white t-shirt had a design printed on it which gives some of the strips a nice change in texture & color.

For the brown necklace I made all the strips the wider 1" strips. I think I like the wider strips better for myself, but liked how both turned out & think that a necklace with many 1/2" strips would be really nice too.

If you can find a t-shirt without side seams the process is much easier. Both my t-shirts had side seams. So I had to line up the seam portion of the strips to cover them with the piece of fabric you bind all the loops with. I first tried making a longer white necklace with two areas bound together to hide the seams, then decided that I like the look of the shorter necklaces so I doubled the loops & bound the two seam portions of the necklaces together.


For the bracelets. There are two options. If your shirt has long enough sleeves you can repeat the necklace process with the sleeves. Both of my shirts had shorter cap sleeves, which is probably why I didn't ware either of the shirt (I have to remember that when shopping). I took a loop made from the T-shirt & tripled the loop length matching the seams up & wrapped them to bind the lops together. I find that the white shirt material looks a little too casual for me. Possibly adding some gold charms or details might help dress them up.

My next attempt I would like to mix colors to crate contrast or possibly something monochromatic. Some tutorials suggested adding charms or embellishments to the necklaces. I think that playing with lengths in the same necklace would also be interesting.

There are two ways to cut your t-shirt. Either scissors or a rotary cutter with a self healing mat. I personally liked using the rotary cutter with a straight edge for ease, and consistency.

If anyone is interested in the white necklace & bracelets. I would be willing to part with them, so just leave a comment or contact me & let me know.

Tuesday, October 12, 2010

My favourite BBQ Pizza


This has been one of my favourite recipes for a long time. I even told my Husband that it just might be my choice of last meal if I had to decide. I know morbid, but that is just how much I love this Pizza. This is a different type of pizza. The tomato sauce has been replaced with a balsamic vinaigrette, & the veggies have been roasted on the BBQ.

I haven't made it for many years, becasue I have been living in an apartment without a BBQ for two years, & I was busy for a year before that planning both my wedding, & my Sister's wedding. Oh ya & the whole graduating from Nursing thing. I guess I have been just a little busy. Now with the impending arrival the new addition to the family we will once again have a very busy period in our lives. I have been wanting to make this recipie since we bought the BBQ in the spring & I have finally got around to it.

The recipie I make has been slightly modified from a Grilled Pizza with Spicy Italian Sausage recipie originally printed in Bon Appetit, July 1997. This recipie has a lot of steps, but most of the prep is done while the dough is rising. In My opinion it is worth the trouble.

I have never used the Spicy Italian Sausage or the green onions. I also like to use feta instead of goat cheese because of price & the tang of the Feta with the balsamic vinaigrette. I have also cut out the Parmesan cheese in the past because I didn't have it on hand, & the resulting pizza was still yummy.

BBQ Pizza:

The Crust Part 1 of 3:

The thought of making crust by hand may be daunting, but this is a really easy crust, as it is made with a food processor. Any Pizza crust with rosemary added would probably work. I have made the dough in a breadmaker (following the recipie for pizza crust that came with the Breadmaker) with chopped rosemary thrown in, & I've made it by hand. All have produced a yummy crust. I do want to stress that the chopped rosemary in the crust for me is one of the things that makes this Pizza swoon worthy. Not to mention the amazing sent while cooking the crusts on the BBQ.

After the Dough has been mixed in the food processor & rosemary kneaded in it has to raise for 1 hour. I have never had the best luck with dough rising, so I like to turn on the stove to 200 0F then turn it off after a few minutes & put the bowl with the dough on top of the element with the heat vent. You have to be careful because if you use a highly conductive bowl it can slightly cook the dough, or if you forget to turn the oven off.

While the Dough Rises:

I usually take this time to prep the vinaigrette, cheese &, all my veggies.


I like to prepare the vinaigrette using a hand blender, but whisking would do as well. I find that the hand blender emulsifies all the ingredients & I do not have to remix all the ingredients during the preparation process. I love this vinaigrette. I think I could eat it by the spoonful like soup. I like to pour the remainder into a bowl & add it to my pizza as I eat it.

It makes it easier later to have the cheese all grated & ready for assembly. The tomatoes need to be seeded & chopped. The peppers have to be seeded & quartered, & the onions cut into 1/2 inch wedges & peeled. According to the recipie it's important when you cut your onions into wedges that you cut through the root end in hope of the wedges staying together. I have found that to be wishful thinking. I have never had them all stay together on the BBQ. I still recommend that you cut the onion wedges as the recipie states. I like to use a grill pan, grill basket, or BBQ wok will make the onions easier to cook, & you will not have to chase them through the gill.

Preheat the BBQ to medium heat

The Crust Part 2 of 3:

After the dough has risen you will need to punch it down & knead the dough a second time, then divide into 4 equal pieces & shape into 9 inch rounds.

Well to that I say ya right. I have never been able to get dough into lovely rounds. Why let that stop you from enjoying pizza goodness. I prefer ugly blobs anyways. Trust me they taste just as good as lovely perfect round crusts, & they look more rustic & homemade.

Final Preparation of Toppings:

Baste the veggies with the vinaigrette on both sides & season with Salt & pepper to your taste. Then place on the BBQ to grill for approximately 8 minutes (4 minutes per side), or until nicely charred. This is where the grilling basked comes in handy.

After the veggies are grilled bring the peppers in to be cut into strips, & I like to split the pieces of onions into strips, especially if you are using a larger onion, but they could also be left in wedges.

The Crust Part 3 of 3:

Now it's time to grill the crust. With the BBQ on medium heat, place the crusts on the grill. I usually grill all 4 at one time. The crust will stick slightly at first, so do not play with them until they are crispy on the bottom with grill marks, & have puffed up slightly. Then flip the crust to the second side for half the time the fist side was grilled. The recipie states 3 minutes on the first side & 1 minute on the second side (for once I actually listen to them).


Final Assembly:

Top grilled crusts (well grilled side up), with 1/4 of the mozza & 1/4 of the Parmesan. Then follow by pepper strips, & onions. Next a 1/4 of the feta (or as much as you can fit on without it falling off), followed by the tomatoes. Finally drizzle 1 1/2 Tbsp of the vinaigrette over each of the Pizzas.

After all the parts are assembled, & your Husband (life partner or guests) exclaim "that is a lot of stuff on there" slide 2 of the pizzas back on to the grill, using a large spatula, until the cheese is melted, & the crust is browned. Then repeat with the 2 other pizzas. Serve with the remainder of the vinaigrette if you like.

Enjoy!


Saturday, October 9, 2010

Pumpkin Pies form hell/Imbecile cook.

For a long time I couldn't figure out why everyone liked Pumpkin pie so much. In fact I never liked pumpkin pie until I had a piece of homemade pumpkin pie. The next year I tried making my own. I figure out that it was the amount of spices that store bought pies have that turn me off. They always tasted like they were trying to cover something up. So for years now I have made pumpkin pies for Thanksgiving.

This year I had a couple of pumpkins that needed to be used or moved to the compost bin, so I thought I would truly make the filling from scratch. I used to do this until I found out that canned pumpkin is better for you than fresh (it has to do with the canning process). I decide to make the filling using my food processor since I have recently aggravated my left wrist, & didin't think I could manage the mashing & mixing needed to make the filling.


As I mentioned earlier I have made pumpkin pies for years now, & I have never had so many thing go wrong. I came very close to scrapping the whole thing & buying pies.

So here is a list of all the strange things that happened:
- Couldn't get the food processor to run (Yes it was plugged in & turned on), finally figured out that the mechanism that clicks into the base of the food processor was stuck in the handle.
- Spilt sugar all over the stove, floor, & in the element.
- Splashed myself with evaporated milk, & an egg.
- Forgot that the food processor was more for dryer ingredients & not high quantities of wet ingredients, it overflowed down the center post if the food processor & all over the base.
-Dropped the food processor blade in the measuring cup I transfer the filling into for easier pouring into the crusts, & almost toppled the whole thing over.
- while transferring the filled crust to the oven the oven rack wouldn't advance, so I had to take them out & readjust the rack.
- 2 minutes after putting the pies in the oven I heard a loud bang in the oven & realized that the high temp had warped the pan, & the filling was pouring out of the pies onto the cookie sheet. -I sacrificed my spoon rest to prop up the pan, & they seemed to level out.
-The crust guards I use to stop the crust from burning adhered themselves to the crusts.

While these pies were cooking I was so scared to leave the pies after this for fear of them bursting into flames. It was the only thing that hadn't gone wrong. Well in the end the pies turned out just fine. Maybe not the prettiest pies I have ever made, but they will do for Thanksgiving dinner, & were even tasty.

Wednesday, September 29, 2010

Sneak peek

I have had many requests for pictures of our nursery. My plan is to do a before & after of the nursery once all the details are in place. As we still have a few elements to figure out & create it will still take us a while to complete all the detail before I document it photographically. For those of you who are asking for pictures, here is a little sneak peek. I first want to apologize for the iPhone pic. It was all I had with me upstairs in my craft room, and as the stairs are not really my friend these day, I was not wiling to run downstairs for my point & shoot.

The pic is of an acorn I made out of felt for a mobile that I am altering because I was not able to find a mobile that fits with our theme, and color scheme. I bought a second hand mobile, and I removed the animals that came with the mobile, and converted them into cute farm animal toys, by removing their cords they were hanging from. Now I am making new objects out of felt to coordinate with our nursery theme & linens. I hope it all comes together soon, and can share all the details with you.

Thursday, September 9, 2010

Amazing Quotes

There are time when I wish I had a better memory, even pre-pregnancy. I love fabulous quotes. Not quotes by writers, historical figures, or politicians, although some are amazing like one of my faves from Winston Churchill "Attitude is a little thing that makes a BIG difference". I have a love for real life regular people quotes. As I have mention in a previous post writing & grammar are not my strong points, so when people succinctly encapsulate a feeling or experience I relate to in an amazing quote. I am always so speechless, which for me is amazing. Today there were three quotes I loved.

The first was from a blog I follow Alphamom.
She described diapering as toddler with this quote
"trying to change a toddler is sometimes more like wrestling with a greased pig in a pile of mud"
If you have ever tried to diaper a toddler, this is an amazing accurate quote.

The second quote and I think my fave of the day was from a friend of ours Jeope "Awesome" Wolfe on facebook of all places. Who was congratulating another friend of ours Christine on her recent engagement. He gave one of the most amazing descriptions of engagement & the final commitment of marriage in a way I have never hear before.
"I loved being engaged! The beginning of a most excellent adventure!"
I loved this statement. If you could see Jeope & his equally lovely wife Kerry together you would know that this truly came from his heart. I love hearing positive statements about marriage in a world full of negative ones. I could easily write a longer more extensive angrier rant than my recently posted pregnancy rant, about "advice" people chose to tell you prior to marriage. None of these statements comes close to how incredibly positive, & heart warming his quote was.

The third was amazingly also on Facebook. Friends of ours Stacey & Joel just a baby & was excited that amazingly they were able to sleep for 6 hours with a new born. A contact of hers made the most amazing statement about baby's, & there unpredictable sleep patterns.
"
Quit writing about it. They know. They always know. Don't even think about how good sleep is, either. They know that, too. Babies are stealth-like-sleep-ninjas.... they know when you get complacent and they will steal your nights. And days. No more jinxing!"
Being that I am an expectant mother & expceting to not get much sleep, & just became a Aunt to my super cute niece who has not always given her parents the same gift of sleep, this was an hilarious & accurate quote.

Monday, September 6, 2010

Always Read the Recipie or Happy Accident

Last Friday Al had suggested that we have dinner at Bistro 71/4. One of our all time favourite restaurants. We managed to get a reservation at the chefs table. A much suggested experience if you can. While eating dinner we started talking about the restaurant Blog by Chef Alexander Svenne. Turns out there are two blogs his side the previously mentioned blog & her side by Danielle Carignan-Svenne written from the point of view of running the front of house.

Chef Alexander at times post recipes on his blog & Al had mentioned a Baked Apple Pancake recipie he though sounded really tasty. The next day I checked out the blogs & decided that the recipie sounded like something I could handle. The best part was that I had some local apples from a family friend's to use.
I did take a few liberties. I decided to use a 91/2 x 91/2" pan, becuase it was what I had on hand, & I used more apples than the recipie calls for. I wanted to use all the apple, because they were getting old, & I didin't think that a few more apples would spoil the recipie, as they are on the bottom of the pan & not mixed in to the pancake mix. In the recipie you have the choice of using apple pie filling, or make your own. I decided to make my own apple filling using the suggested brown sugar, butter, & cinnamon sauteed in a pan with the sliced, peeled, cored apples.
After the apples have softened, and the brown sugar & butter have melted spread apple mixture in the bottom of your chosen grease baking pan.

Always Read the Recipe:

Now for the part where I screw up the recipie. I read over the recipe several times. On the internet, after printing it, before starting the recipie, & as I made the recipie. My problem is that I have the type of brain that fills in what I think recipie reads vs. what the actual recipie reads (oops!). So in my special interpretation I mixed all the ingredients that are listed for the pancake part of the recipe together including the sugar & cinnamon that were to be reserved for the top of the pancake once it was done. Being that I have made pancakes & cakes before I decided to try it out with the extra ingredients.

I poured the pancake mixture on top of the apples & baked it until (as the recipie states) it was puffy, firm and golden brown. I found probably because of the extra apples, the smaller pan, and the extra ingredients to bake a little slower int he middle & I had to add a few more minutes to make sure it was baked through.

The happy accident:
The result was a yummy fluffy cinnamon pancake with tangy cinnamon apple bottom. We didin't have the ingredients to make the Cinnamon Cider Syrup, so we use maple syrup. It was so good that we ate the whole thing. I will definitely make this recipie again. It was easy, yummy, and a nice treat for a weekend breakfast. I think it would make a nice dessert, especially toped vanilla icecream & the Cinnamon Cider Syrup drizzled over top.


Friday, September 3, 2010

Pregnancy rant in 3...2...1...

First I want to thanks everyone for the helpful advise & suggestions. I love helpful advice.I'm getting tired or advice like "just wait it will never be the same" or "get your sleep now because you will never get sleep after the baby" that... one gets a DUH!!! The best has been "buy your gadgets now" What gadgets???? We aren't gadget people.

I still don't understand why parents & women don't support each other rather than cutting each other down & making a huge comparison game out of parenting. No wonder why children are self conscious, from the very moment they are born they are continuously judged by others,& often don't meet others standards. Why can't we just let babies grow at different rate, talk at different ages,& walk in their own time.

No one gets a gold metal at their child first birthday. It's not a game it's your life. More importantly it's your child's life.

That feels better. I have been holding that in since the moment we made our pregnancy popular knowledge.

I will get off of my pregnancy soap box now.

Monday, August 16, 2010

Bryan Scott

I have been a member of Flickr Since 2006. I love the camaraderie of my fellow photography contacts & the inspiration of other members. There are several contacts that I look forward to seeing every time I log in. Bryan Scott tops this list. He is an outstandingly talented Photographer. He captures Winnipeg in a way I wish everyone would see it. The most interesting part of his photography, other than the amazing beauty, is the inclusion of historical dates with his photography. One of my favourite shots of his is this wintry Wolseley back lane. He has done some really cool time laps videos of Winnipeg. He also has a blog Winnipeg: Love and Hate. On his blog there is a very cool city map function, the ability to purchase prints, & coming soon Winnipeg love Hate (The Book).

Saturday, July 24, 2010

What's in a Name

Besides the decision to share my thoughts & my life on line, the most difficult decisions was what to name my blog. I am always amazed by the creative & unique names people create for their blogs & often wonder about the decision process behind the choice/creation of a name. A few of my favourite blog names include:

Friday, July 23, 2010

Kraut King


Today was the last day to enjoy a meal at downtown fave Kraut King before it closes its doors. The long standing restaurant has been dealing with rising crime in the area chasing away business. I had never had the chance to visit the Kraut King. I decided to take in the last day, & it looks like I was not alone. I unfortunately had a poor experience today, but I understand that this is not the usual situation. The staff appeared out of sorts, and having a difficult time holding things together. Once I finally got my meal, It was very tasty, but a bit greasy for my liking. I wish I would have experienced The Kraut King before it's final days.

It makes me so sad to hear about local businesses that are having a hard time making ends meet after so many years of lucrative business, only to have the city let them down. Alcoholism & drug addiction is not a problem that can be continually pushed aside. People with addictions deserve respect. The City has to understand that these issues need to be dealt with at the root of the problem, & not just sweep under the carpet. There needs to be programs that not only provides programs to deal with addiction, but additionally provides further services to help them regain a life without addiction. Until the true problem is delta with there will never be a solution.

Thursday, July 22, 2010

Smiles & Tears

Today was a happy day for me. A day I have been waiting for for a long time. In fact a day I never thought would happen. Today was the day that L'Occitane opened in Polo Park. I know it seems a little crazy & weird to be so excited about the opening of a skin care store. Living in Winnipeg often means waiting for a long time for the stores you love to open. I often have to wait for a trip to the US or a major center like Toronto or Vancouver to find the stores you love. The only other option is to order online & pay huge shipping fees. Which explains my excitement for the store opening today.

My Love for L'Occitane started several years ago when I first found this amazing store on a trip to Chicago with my mother & sister. That was the day I fell in love with their Shea Butter hand & Foot cream. Its not cheap, but the 150ml tube last a long time for the price, & it's rich non greasy formula that leaves winter chapped skin soft & rejuvenated.

Then a little over a year ago during my trip to Japan I finally ended my 12+ year search for a face care line that doesn't irritate my sensitive face with a little rosacea thrown in. I have tried many skin care lines and all of them seemed to be my answer for the first month or two, then sure enough my face would flare up & become tight & uncomfortable. Starting another search for a new skin care line. Finally while on my trip my mother told me of a skin care line she heard of from L'Occitane. I started using the Shea & Cotton line during my trip & have had happy skin ever since. I have never found a skin care line that I have LOVED, but this was it. My skin has not broken out or flared up for over a year.

Then today at the Grand opening My dreams were crushed & all of my excitement turned to sadness. I was so excited to be able to buy the products I love at home. While I enthusiastically told my sister about the amazing properties of the skin care products I love so much, I noticed that the skin cleaner was not on display. I asked the product rep who politely informed me that it had been DISCONTINUED. All I could think was "what it couldn't be"I couldn't believe it. Doesn't it drive you crazy when you finally find a product you love they inevitably discontinue it? I think I stared at the shelf searching wildly for the coveted face cleanser hoping to make it appear out of thin air, but it never appeared. Once I got home I tried to find it on the L'Occitane website, with no luck.

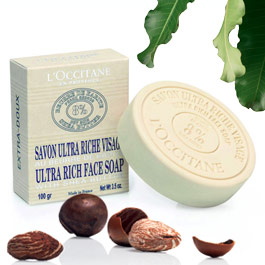
So now the search I thought was finally over has started again. I bought the Shea & Cotton face soap with the hope that my face will like it, remaining comfortable & free of flair ups. I have tried the other Shea & Cotton face cleansing options, with poor results. I hope the search will be short & inexpensive, with better results than my past attempts.